In this blog complete solution for "How to create and add a signature to your message in Outlook" follow all given steps.

Microsoft Outlook, a part of office suite is a personal information manager used particularly for emails. It also includes other applications like contact manager, note taking, calendar, task manager, journal and more. A user can use it as a stand-alone application or with Microsoft SharePoint server and Microsoft Exchange Server. Its different versions are available for Windows, Mac, iOS and Android operating system.
Outlook also allows the users to add personalized signatures for the email messages. This helps the users to draft an email without adding their signatures every time in it. Apart from text, you can also add images, logo of your business, electronic business card and even an image of your handwritten signature. You can further choose from two options while adding a signature. This includes adding them automatically to all outgoing emails or choosing which messages include a signature. To add your signatures, follow the below mentioned steps (for Outlook 2016 and 2013):
For adding an image or logo to your signature, follow these steps:
This will go perfect if you don’t want to automatically add the signature in every email, reply or forwards. Follow these steps to add a signature manually:
Still, if you find any kind of technical glitches while performing this contact with Outlook Customer Support.
Source: http://help-number.com/blog/how-to-create-and-add-a-signature-to-your-message-in-outlook/

How to fix HP printers ‘Ink System Failure’ Error?
HP offers best range of printers HP Deskjet printers, HP Deskjet Ink Advantage printers, HP Ink Advantage Ultra printers, HP Deskjet GT printers, HP LaserJet Pro printers, HP Laser Jet Ultra printers, Laser Jet MFP, HP PageWide business printers and more. But sometimes ‘Ink System Failure’ Error may occur, here is complete solution for this problem.
Black Friday 2017- Microsoft’s Bing features to give you an ultimate shopping experience
Now the big shopping day, retailers have already started to preview their best deals and discounts.
How to use AOL spam and privacy features?
AOL mail is being used by millions of users across the world, This free web-based email service gives the users a number of features which makes it different from other email services. Due to unlimited storage space and up to 25 MB attachment limit, it offers high-level of spam and privacy protection.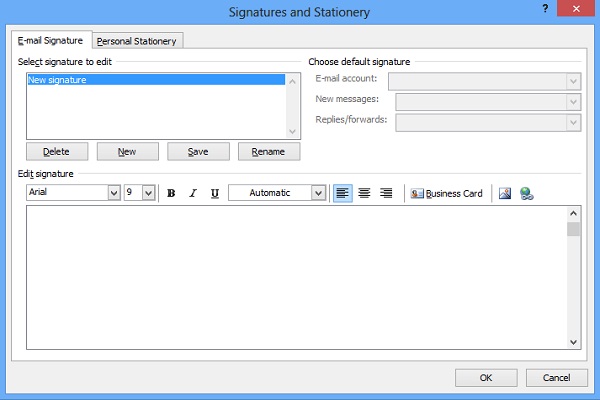